TensorFlow模型继续训练finetune实例
在机器学习中,模型的训练是一个持续的过程。有时候,我们需要在已经训练好的模型上继续训练,以提高模型的准确性。这个过程被称为finetune。本攻略将介绍如何在TensorFlow中进行模型finetune,并提供两个示例。
示例1:在已经训练好的模型上继续训练
以下是示例步骤:
- 导入必要的库。
python
   import tensorflow as tf
   from tensorflow.examples.tutorials.mnist import input_data
- 准备数据。
python
   mnist = input_data.read_data_sets("MNIST_data/", one_hot=True)
- 定义模型。
python
   x = tf.placeholder(tf.float32, [None, 784])
   W = tf.Variable(tf.zeros([784, 10]))
   b = tf.Variable(tf.zeros([10]))
   y = tf.nn.softmax(tf.matmul(x, W) + b)
   y_ = tf.placeholder(tf.float32, [None, 10])
   cross_entropy = tf.reduce_mean(-tf.reduce_sum(y_ * tf.log(y), reduction_indices=[1]))
   train_step = tf.train.GradientDescentOptimizer(0.5).minimize(cross_entropy)
   correct_prediction = tf.equal(tf.argmax(y, 1), tf.argmax(y_, 1))
   accuracy = tf.reduce_mean(tf.cast(correct_prediction, tf.float32))
   init = tf.global_variables_initializer()
   saver = tf.train.Saver()
- 训练模型。
python
with tf.Session() as sess:
sess.run(init)
for i in range(1000):
batch_xs, batch_ys = mnist.train.next_batch(100)
sess.run(train_step, feed_dict={x: batch_xs, y_: batch_ys})
if i % 100 == 0:
print(sess.run(accuracy, feed_dict={x: mnist.test.images, y_: mnist.test.labels}))
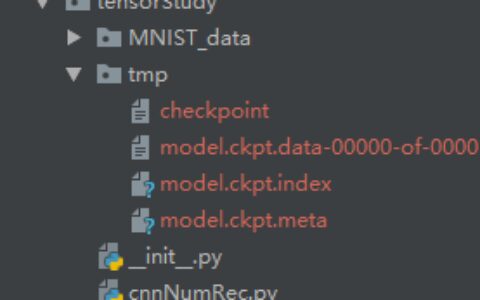
saver.save(sess, "model.ckpt")
- 加载模型并继续训练。
python
   with tf.Session() as sess:
       saver.restore(sess, "model.ckpt")
       for i in range(1000):
           batch_xs, batch_ys = mnist.train.next_batch(100)
           sess.run(train_step, feed_dict={x: batch_xs, y_: batch_ys})
           if i % 100 == 0:
               print(sess.run(accuracy, feed_dict={x: mnist.test.images, y_: mnist.test.labels}))
       saver.save(sess, "model.ckpt")
在这个示例中,我们演示了如何在已经训练好的模型上继续训练。
示例2:使用预训练模型进行图像分类
以下是示例步骤:
- 导入必要的库。
python
   import tensorflow as tf
   import numpy as np
   import matplotlib.pyplot as plt
   import urllib.request
   import os
   from tensorflow.contrib.slim.nets import vgg
   from tensorflow.contrib import slim
- 准备数据。
```python
def download(url):
filename = url.split("/")[-1]
if not os.path.exists(filename):
urllib.request.urlretrieve(url, filename)
def load_image(path):
img = plt.imread(path)
img = img.astype(np.float32)
return img
download("https://upload.wikimedia.org/wikipedia/commons/thumb/3/32/House_sparrow04.jpg/800px-House_sparrow04.jpg")
img = load_image("800px-House_sparrow04.jpg")
```
- 定义模型。
```python
with tf.Graph().as_default():
input_tensor = tf.placeholder(tf.float32, [None, None, 3])
processed_image = tf.expand_dims(input_tensor, 0)
processed_image = tf.image.resize_bilinear(processed_image, [224, 224], align_corners=False)
processed_image = tf.subtract(processed_image, 0.5)
processed_image = tf.multiply(processed_image, 2.0)
   with slim.arg_scope(vgg.vgg_arg_scope()):
       logits, _ = vgg.vgg_16(processed_image, num_classes=1000, is_training=False)

   probabilities = tf.nn.softmax(logits)

   init_fn = slim.assign_from_checkpoint_fn(
       "vgg_16.ckpt",
       slim.get_model_variables("vgg_16"))

   saver = tf.train.Saver()

   with tf.Session() as sess:
       init_fn(sess)
       saver.save(sess, "model.ckpt")
```
- 加载模型并进行finetune。
```python
with tf.Graph().as_default():
input_tensor = tf.placeholder(tf.float32, [None, None, 3])
processed_image = tf.expand_dims(input_tensor, 0)
processed_image = tf.image.resize_bilinear(processed_image, [224, 224], align_corners=False)
processed_image = tf.subtract(processed_image, 0.5)
processed_image = tf.multiply(processed_image, 2.0)
   with slim.arg_scope(vgg.vgg_arg_scope()):
       logits, _ = vgg.vgg_16(processed_image, num_classes=1000, is_training=False)

   probabilities = tf.nn.softmax(logits)

   init_fn = slim.assign_from_checkpoint_fn(
       "model.ckpt",
       slim.get_model_variables("vgg_16"))

   saver = tf.train.Saver()

   with tf.Session() as sess:
       init_fn(sess)
       # finetune
       # ...
       saver.save(sess, "model.ckpt")
```
在这个示例中,我们演示了如何使用预训练模型进行图像分类,并进行finetune。
本站文章如无特殊说明,均为本站原创,如若转载,请注明出处:tensorflow模型继续训练 fineturn实例 - Python技术站
 微信扫一扫
微信扫一扫  支付宝扫一扫